Yup, another model!
Inspired more than a little by a repeat viewing of the recent Godzilla quadrilogy of films, I wanted to make a monster story. I'd also wanted to experiment with snow and ice. Being a mythos fan, I decided the story of this piece would be some explorers discovering something locked in glacial ice but somehow still alive.
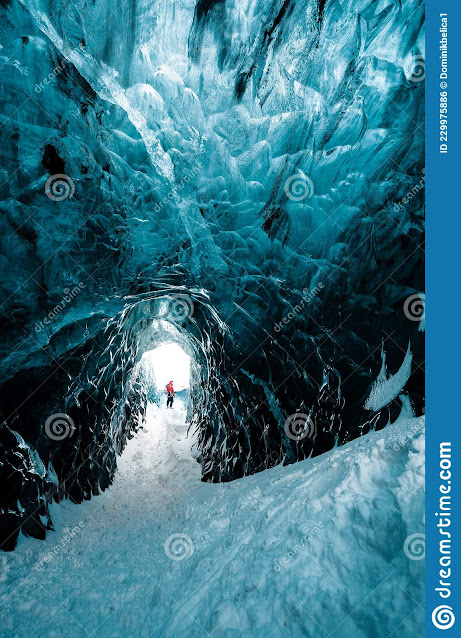
I don't know if you've ever been lucky enough to see the inside of a glacier up close. On a school skiing trip to Interlaken in Switzerland in the 1980's, we took the train up through the Eiger where, near the top, there was a small glacier. The interior had been tunnelled into, with sculptures dotted along the walls in alcoves along the twisting paths. Magical!
For me, the formative moment was a particular narrow passage that snaked through the ice. It was so narrow that you had to turn sideways and slip through. My face was often pressed against the ice. Part way through, I stopped. All around me was a deep blue silence. It was like standing in an ocean that had paused in time. There was also that slight feeling that, at any moment, the mountain might breathe and I would be crushed to atoms. Not sure why that didn't panic me, but there we are. That place and moment have stayed with me for tum-te-tum years, and would be in my head a lot building this thing.
I started off with some online research.

The ice is rippled and smooth, with a character of colour that is quite remarkable. So deep and beautiful. I decided to use 3mm thick Perspex, the ice 'dimples' carved using a Dremel and then the sheet shaped with a heat gun. As ever, I'd never done this kind of thing before, so had no idea how it would turn out. I ended up getting very bored with doing the dimples (not a 1920's dance craze) and shaped the panel half way through the process.
Once the sheet was done, I streaked the back of it with black to show the soil and detritus that gets swept up in some glaciers.
I stuck the ice sheet to a piece of Perspex the same size as it, then boxed-in the back of it. After that, I spent a little time with the two explorer minis (from the Pulp Figures by Bob Murch range sold by
North Star) figuring out the composition.
I lined the inside of the box with aluminium foil and put in a single layer of blue gel to experiment with how much I would need to use to get the right lighting effect. I ended up using a double layer. The gel is on both sides of where the lights are to ensure that bounced light would deepen in colour.
I made the basic shapes that defined the snow out of foam board bought from
Hobbycraft. I'd decided to break-up the ice sheet with a meltwater & snow pillar (and an extra little one), also made from foam board. At the same time, I also painted the minis (I use
Army Painter paints) and, when I needed a little morale-boost, ran lighting tests to give a reminder to myself of how this would potentially end up looking.
As I'd never done snow before, I did some reading and YouTube tutorial viewing on what to order and how to do it. It was recommended that, to get a feeling of depth to the snow, it is worth painting in blues the base onto which the snow is to be placed. So I did. I also decided that I would streak some snow across the ice beyond the pillar to show wind direction.
I'm really not sure if that worked. I'm not entirely happy with the final result of that bit, but decided to leave it on. This is meant to be a learning process, and I'm content to leave my mistakes there for me to see in the future.
I bought three things to do the snow. From
Firestorm Games I got 275ml tubs of Basing Snow - Fine, and Basing Snow - Extra Fine by Colour Forge, and I'd picked up the Vallejo Diorama Effects Water Texture Acrylic Foam Effect paint, I think from Hobbycraft or possibly
Green Stuff World, to do fine detail. I built-up the layers and sculpted the terrain as I went. Unfortunately, I ran into a problem.
I normally use Gorilla wood glue to do my terrain scatter. It turned out to be useless for snow - it dyes the snow yellow. We don't want yellow snow. In the end, I painted that first layer white and started using craft glue thereafter as that dried clear (but slower). At some point I stuck down the minis.
A note about the pics - despite my 'old' Galaxy S9+ having a great camera, it just doesn't show snow terrain particularly well. Some of the detail is lost. Just so you know. :)
I was still tinkering with lights at this stage. I'd put in four blue LEDs in the 'roof' of the box. They gave nice ambience, and I though that would do. It was time to build the beastie trapped in the ice. This I did from card, layered and carved foam board, and some bamboo skewers. A lot of the detail in this would never be seen, but I figured it was worth putting in there. I based the model on a picture of a
Star Spawn of Cthulhu by Aeon Oxide that I spotted on Deviant Art.
When I put the Star Spawn into the box, lighting it from behind with a cluster of four white LEDs, I discovered there was too much light from the blue ones. In the end, after a lot of experimentation, I was left with one blue bulb down at the bottom of the box behind the beastie, and four white ones clustered behind it. The picture below is from before I removed the four lights in the roof, but it shows that I added a yellow LED, deep set in the foam, for the baleful eye of the entombed beast.
I was still tinkering with the base as I waited for the final lights to come from my hero, Jennifer Maddox, who runs
Small Scale Lights. Jennifer was kind enough to build a bespoke bit of kit to put a heart beat pulse behind the creature in the ice. I've used SSL on three models now (one I've not finished with yet), and have always been delighted with the results. Jennifer makes it all so easy, even for newbies like me.
Final details were added to the base, with little clear resin icicles from Green Stuff World. The lighting rig was test installed, checked, final installed, checked, boxed up in foam board to protect the PCB and wiring, and checked again. I'd glued the roof down but, when I turned on the lights for one last check, I discovered a blob of glue had somehow dripped down the inside of the Perspex. I had to carefully hack the roof back off, pick-off the glue, and then re-glue the roof on.
I painted and matt varnished the top and sides of the box, and then declared the whole thing finished!
If the above video doesn't work for you, it can be found on
YouTube.
The end result is one I'm content with. It was a learning experience, doing a few things I've never done before, and I'm happy with what I achieved. I'd do a few things differently next time, including possibly fully boxing the diorama and going for a more cave-like end result. That's for another model, however. This one is done and works rather well. :)
EDIT: I'm very honoured to have my amateur efforts picked by Jennifer of Small Scale Lights fame to be one of the
Models of the Week there.


No comments:
Post a Comment